9 min read
Disclosure: As an Amazon Associate and eBay Partner Network publisher, we earn from qualifying purchases. This doesn’t affect what we recommend or how we describe it.
Bidet attachments serve three very different types of users: eco-conscious homeowners looking to cut down on toilet paper, renters seeking a non-permanent upgrade, and people with mobility or medical needs who want better hygiene and independence. Each group cares about the installation process for a different reason—whether it’s minimizing permanent changes, fitting into a compact bathroom, or ensuring the device is easy to use for daily routines. The most important thing to know: installing a bidet attachment is rarely as complicated as it sounds, but the difference between a smooth 20-minute job and a frustrating afternoon often comes down to details like toilet compatibility, water shutoff access, and a few specific measurements most guides gloss over.
Critical factors before installation: compatibility and space
Not every bidet attachment fits every toilet. The two most common stumbling blocks are the shape of your toilet seat (round or elongated) and the clearance between the toilet tank and the seat mounting holes. Most attachments require at least 1.5–2 inches (38–50 mm) of flat space behind the seat bolts to sit flush and allow the water line to connect. Compact or one-piece toilets, especially those with a curved tank, can be challenging—some may not accommodate a standard attachment at all.
Measure the distance from the center of the seat bolts to the edge of the tank. Anything less than 1.5 inches is likely to be a tight fit. Also, check for obstructions like flush levers, molded tank shapes, or built-in cleaning features. If you’re in doubt, look for an attachment specifically marketed as “compact fit” or “universal,” but even then, read the fine print for minimum clearance requirements.
How the main types of bidet attachments compare
There are three primary configurations you’ll encounter: basic cold-water attachments, dual-temperature models, and electric units with advanced features. Each has distinct installation steps, parts, and potential complications. The table below breaks down the real-world trade-offs.
| Configuration | Water Source | Seat Compatibility | Required Clearance | DIY Install Time |
|---|---|---|---|---|
| Basic cold-water attachment | Toilet tank only | Round & elongated | 1.5–2.5 in (38–64 mm) | 15–25 min |
| Dual-temperature (hot/cold) | Toilet tank + sink hot line | Mostly elongated | 2–3 in (50–76 mm) | 25–40 min |
| Electric bidet seat/attachment | Internal heating | Elongated only | 2.5–4 in (64–102 mm) | 40–60 min |
Step-by-step guide: how to install a bidet attachment
- Shut off the water supply. Locate the shutoff valve (usually behind or beside the toilet), turn it clockwise until it stops, and flush to empty the tank.
- Remove the toilet seat. Pry up the plastic bolt covers behind the seat, then use a flathead screwdriver or wrench to unscrew the bolts. Lift the seat off and set it aside.
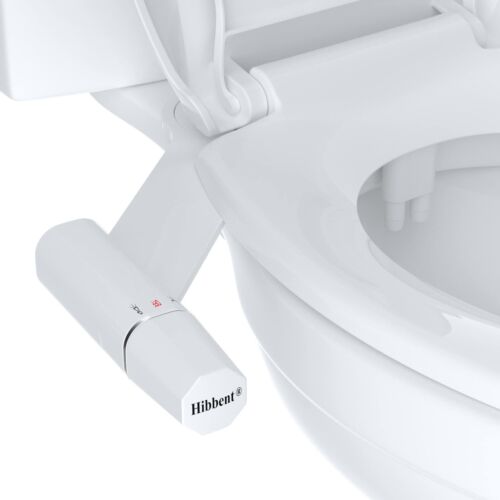
- Position the bidet attachment. Center the attachment’s mounting plate over the seat bolt holes, making sure the nozzle arm lines up with the bowl. Double-check that the control panel clears the tank and doesn’t block seat movement.
- Reattach the toilet seat. Place the seat on top of the bidet attachment’s mounting plate, align the holes, and reinsert the bolts. Tighten by hand, then with a screwdriver—don’t overtighten, or you might crack the porcelain.
- Connect the T-adapter. Unscrew the water supply hose from the bottom of the tank (not from the wall), then attach the supplied T-adapter to the tank’s fill valve. Reconnect the supply hose to the bottom of the T-adapter. Attach the bidet hose to the side port on the T-adapter.
- Connect the bidet hose to the attachment. Screw the other end of the hose onto the inlet at the side or back of the bidet attachment. Hand-tighten only—using a wrench risks stripping the threads or cracking plastic fittings.
- Check for leaks and restore water. Slowly turn the shutoff valve counterclockwise, watching for drips at every connection. If you see any, shut the valve and gently reseat the fittings or add plumber’s tape as needed.
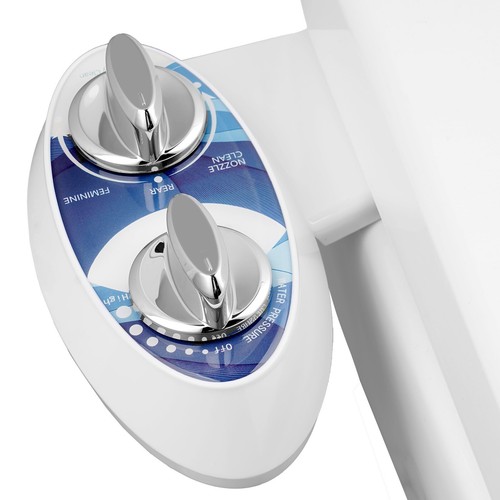
- Test the bidet function. With the seat down, turn the control knob to activate the spray. Adjust aim and pressure as needed. Some attachments have a self-clean nozzle function; run this cycle before first use.
What can go wrong? Common mistakes and troubleshooting
Most installation headaches come down to three issues: leaks at the T-adapter or hose, the attachment not fitting due to tank/seat geometry, or cross-threading the plastic fittings. Always use hand pressure when tightening plastic parts. If a connection drips, remove it, wrap threads with PTFE plumber’s tape, and try again. For leaks at the supply hose, check that the rubber washer is in place and not pinched.
If the seat rocks or wiggles after reassembly, the mounting plate may be misaligned. Loosen the bolts, reposition, and retighten. For dual-temperature models requiring a hot water hookup, the biggest challenge is running a hose from the sink’s hot tap to the toilet—this often means you need a 6–9 foot (1.8–2.7 m) hose and may need to drill a small hole in the vanity side panel. If you encounter a non-standard valve size (less common in older homes), adapters are available at most hardware stores.
For electric units, be sure a grounded GFCI outlet is within 3–4 feet (90–120 cm) of the toilet; extension cords are not recommended due to splash risk. If you don’t have a suitable outlet, you’ll need an electrician for safe installation.
How the options compare for different bathrooms
The right installation approach depends on your bathroom layout and needs. For renters, basic cold-water attachments are easiest to install and remove without permanent changes. They require only a few tools (usually a screwdriver and adjustable wrench) and no drilling or electrical work. Dual-temperature attachments are best for master baths with a nearby vanity, but their installation is more involved: running a hot water hose neatly is the biggest hurdle.
Electric bidet seats or attachments offer features like heated water, air drying, and adjustable nozzle position, but they’re typically bulkier and require both electrical and plumbing work. They also almost always fit elongated toilets, not round ones. If you have a skirted or one-piece toilet, check for “skirted fit” or “one-piece compatible” designs, and be prepared for a tighter installation process.
See what’s available in each configuration to match your bathroom and comfort level.
Related Guides
- Our guide to How to Install a Bidet Attachment: Step-by-Step Guide for Beginners
- How to Install a Wall-Mounted Pull-Up Bar: Step-by-Step Instructions
- The Best Pill Splitters, Reviewed and Compared
- Electric Pill Crushers That Are Worth Buying
- UV Cleaning Water Bottles That Actually Work: Our Top Recommendations
- Portable Mini EMS Devices for Travel: Compact Relief on the Go
Total cost of ownership
Installing a bidet attachment isn’t just about the upfront price. Here are the real-world ongoing or hidden costs you should factor in:
- Replacement hoses and washers: Most hoses and rubber washers last 2–4 years before needing replacement to prevent leaks. Expect to spend about $10–$20 every few years.
- Water usage: Bidet attachments typically use 0.1–0.2 gallons (0.4–0.8 liters) per use. On average, this adds only a few dollars a year to your water bill, but electric models with heated water can use more.
- Cleaning and maintenance: Nozzles should be cleaned monthly to prevent buildup. Some units have self-cleaning features, but manual cleaning may require a mild descaler or vinegar solution—budget a few dollars annually.
- Electricity (for electric models): Heated seats and water typically draw 600–1200 watts when active. With typical use, expect about $10–$25 per year in electricity costs, depending on your local rates.
- Optional accessories: Add-ons like water filters or deodorizing cartridges can cost $10–$30 per year, depending on usage and preferences.
Factor these into your long-term budget, especially if you’re comparing a basic attachment to a premium electric model.
Frequently asked questions about installing bidet attachments
Will a bidet attachment fit my toilet if I have less than 2 inches of space behind the seat bolts?
Most standard bidet attachments require at least 1.5–2 inches (38–50 mm) of flat space behind the seat bolts to fit properly. If your toilet has less clearance, look for a compact or “slim fit” model, but be aware that not all toilets will be compatible, especially with one-piece or French-curve designs.
How long does installation really take for a first-timer?
For a basic cold-water model, most users can complete installation in 15–25 minutes, including removing and reattaching the toilet seat. Dual-temperature and electric attachments can take 30–60 minutes, especially if you need to run hoses or set up electrical connections. Extra time may be needed for troubleshooting leaks or unusual fittings.
Can I install a bidet attachment in an apartment or rental?
Yes, most bidet attachments are renter-friendly because they require no permanent modifications—just unscrewing and reattaching the seat and connecting hoses. Always keep the original fittings in case you need to revert the setup when you move out. Electric units may not be allowed without landlord approval if they require new outlets.
Cold water vs dual-temperature: which is better for winter climates?
Cold-water attachments are simple and reliable but deliver unheated water, which can be uncomfortable in cold climates. Dual-temperature models allow you to mix in warm water from a nearby sink, providing a more comfortable experience but requiring extra installation work and a compatible bathroom layout. For true winter comfort, an electric heated unit is the most effective, though more expensive and complex to install.
What should I do if the T-adapter or hoses leak after installation?
First, shut off the water. Unscrew the leaking connection, check for a missing or misaligned rubber washer, and wrap threads with PTFE plumber’s tape before reconnecting. Hand-tighten only; overtightening can damage plastic threads. Persistent leaks may indicate a mismatched or defective fitting—replacement adapters are widely available at hardware stores.
Are there any health or safety certifications I should look for?
Look for attachments that meet recognized plumbing standards such as ASME A112.18.1/CSA B125.1 or are certified by organizations like the International Association of Plumbing and Mechanical Officials. These certifications help ensure the materials are safe for potable water and resist leaks or cross-contamination.
How often should I clean and maintain the bidet nozzle?
Clean the nozzle at least once a month to prevent mineral buildup and bacteria. Many attachments have a self-cleaning feature, but for manual cleaning, use a soft brush and a mild vinegar solution. Regular maintenance extends the life of the attachment and preserves water pressure.
Making the right call: my take
Installing a bidet attachment is within reach for most people, even if you’ve never done plumbing work before. The key is measuring carefully, double-checking compatibility, and taking your time with each connection. For most renters and first-timers, a basic cold-water attachment is the lowest hassle and best value. Homeowners who want more comfort or have cold winters should consider dual-temperature or electric options, but weigh the extra installation steps and long-term costs. Whatever you choose, a well-installed bidet is a genuine upgrade—both for hygiene and for your wallet. Compare today’s deals to find the right fit for your bathroom and budget.


Last updated: June 2026 · About our research