8 min read
Disclosure: As an Amazon Associate and eBay Partner Network publisher, we earn from qualifying purchases. This doesn’t affect what we recommend or how we describe it.
Your doctor asks you to track your blood pressure at home, but your digital monitor arrives with a cryptic manual, a tangled cuff, and a screen full of unfamiliar icons. You want results you can trust—not just random numbers. This guide walks you through setting up a digital blood pressure monitor correctly, step by step, and highlights the details that actually affect accuracy and ease of use. Whether you’re checking for hypertension, managing medication, or simply want a clearer picture of your health, you’ll learn how to get reliable readings—and avoid the pitfalls that leave many people second-guessing their results.
Why setup matters more than you think
It’s tempting to assume that any digital blood pressure monitor is “plug and play.” In reality, setup errors are one of the most common reasons people get inaccurate readings at home. Even a loose cuff, a misaligned artery marker, or a poorly chosen memory setting can skew results by 10 mmHg or more—enough to make a difference in treatment decisions. The best digital monitors are designed to minimize user error, but only if you understand their quirks and configure them properly from the start.
Different monitor styles—and why setup steps vary
Digital blood pressure monitors generally fall into two main categories: upper arm cuff models and wrist cuff models. Each has its own setup nuances, and the choice between them affects accuracy, comfort, and usability. Upper arm monitors are the gold standard for home use, recommended by most professional guidelines. Wrist models can be more convenient, especially for users with limited mobility or very large arms, but they require extra care in positioning and calibration.
| Configuration Type | Best For | Typical Cuff Size Range | Power Source | Memory Capacity |
|---|---|---|---|---|
| Upper arm, basic digital | Reliable daily tracking | 22–42 cm | AA/AAA batteries | 30–60 readings |
| Upper arm, app-connected | Tech-savvy, trend tracking | 22–45 cm | Rechargeable or batteries | 100+ readings, cloud sync |
| Wrist, compact | Travel, limited arm mobility | 13.5–21.5 cm | AAA batteries | 60–90 readings |
| Upper arm, large-cuff | Extra-large arms | 32–52 cm | AA batteries | 30–60 readings |
| Upper arm, dual-user | Couples or shared device | 22–42 cm | AA/AAA batteries | 2×60 readings |
How to set up a digital blood pressure monitor: step-by-step
- Unpack all components and check contents. Ensure you have the monitor unit, cuff (correct size for your arm), batteries or charger, and the instruction manual. Missing or mismatched parts are a leading cause of setup headaches.
- Install batteries or charge the device. Open the battery compartment and insert fresh AA or AAA batteries, observing polarity. For rechargeable models, plug in and fully charge before first use—full power ensures stable readings.
- Set date, time, and user profile. Use the monitor’s buttons to enter the correct date and time. If your monitor supports multiple users, assign yourself to a profile to keep readings separate. Accurate timestamps are critical for tracking trends.
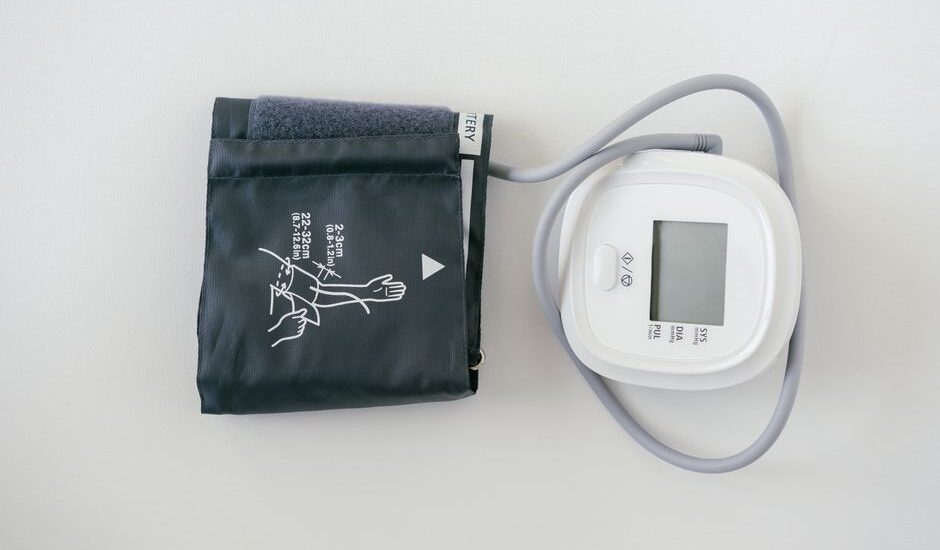
- Attach the cuff correctly to your arm. Slide the cuff onto your bare upper arm (or wrist, for those models), with the tubing aligned over your brachial artery—usually marked by a symbol on the cuff. The lower edge should sit 2–3 cm above your elbow crease. Secure snugly: you should be able to insert one fingertip between cuff and skin, but not more.
- Position yourself for an accurate reading. Sit upright in a chair with back support, feet flat on the floor. Rest your arm on a table at heart level, palm up. For wrist monitors, keep your wrist at heart height—this is non-negotiable for accuracy.
- Power on and take a test reading. Press the start button. Remain silent, still, and relaxed during the measurement. Wait for the cuff to inflate and deflate automatically; the monitor will display your systolic and diastolic numbers.
- Review and store your results. Check that the reading is within your expected range (typically 90–120 mmHg systolic, 60–80 mmHg diastolic for healthy adults, but individual targets vary). Save the result to your user profile or sync with your app if available.
See what’s available if you want to compare monitors with different cuff sizes or memory features.
The overlooked spec: cuff size and fit
Too many buyers skip over cuff sizing, assuming “one size fits all” applies. In reality, using a cuff that’s too small or too large can shift readings by as much as 10–30 mmHg. Most upper arm cuffs fit arms from 22–42 cm in circumference, but some monitors offer large-cuff variants for arms up to 52 cm, and wrist cuffs typically fit 13.5–21.5 cm. Measure your arm with a fabric tape at the midpoint between shoulder and elbow before buying. Never trust guesswork here—accuracy depends on it.
What most buying guides get wrong about memory and data tracking
Many buyers focus on how many readings a monitor can store—30, 60, even 100+—but miss the more important distinction: how easy it is to retrieve, interpret, and share those results. Some monitors segment readings by user or sync to a smartphone app, while others simply overwrite old data or lump all users together. If you’re sharing the device or tracking trends for your doctor, look for models with at least 2 user profiles and a clear retrieval interface. For tech-averse users, a simple one-touch recall is often more usable than a feature-rich app.
Related Guides
- How to Set Up a Digital Blood Pressure Monitor: Step-by-Step Guide
- Blood Pressure Monitors, Reviewed and Compared
- Bluetooth Blood Glucose Meters: A Practical Buyer’s Guide
- Digital Scales vs Analog Scales: Which Should You Choose?
- Digital Otoscopes for Home Use: What to Know Before You Buy
- Digital Pill Organizers With Reminders: Are They Worth It?
Common mistakes to avoid
- Using the wrong cuff size. A cuff that’s too tight or too loose distorts results—always match the cuff to your actual arm circumference, not just your body size.
- Skipping the date/time setup. Failure to set the clock means your readings won’t line up chronologically, making it impossible to spot trends or share reliable logs with your doctor.
- Positioning your arm incorrectly. If your arm (or wrist) isn’t at heart level, readings can be falsely high or low by 5–15 mmHg. This is especially problematic for wrist monitors.
- Taking readings immediately after activity. Blood pressure spikes after exercise, meals, or even a brisk walk. Wait at least 5 minutes at rest before measuring for a true baseline.
- Ignoring low battery warnings. Fading batteries can cause inconsistent results or monitor malfunctions. Always start with fresh batteries or a full charge.
Check current prices if you’re considering upgrading to a model with more robust battery life or an easier-to-use display.
Clinical context: how home monitors stack up to clinic results
Home digital monitors, when set up and used correctly, can achieve accuracy within ±3 mmHg compared to professional-grade devices. However, studies consistently show that user error—especially incorrect cuff placement and posture—accounts for the majority of discrepancies. For most adults, upper arm monitors are preferred for reliability, while wrist models require extra diligence in positioning. If you have an irregular heartbeat or significant vascular disease, look for monitors with arrhythmia detection or consult a healthcare provider for device recommendations. For more on home blood pressure monitoring standards, see the American Heart Association.
FAQ: Real-world answers about setting up digital blood pressure monitors
How long does it take to set up a digital blood pressure monitor?
Most users can complete the full setup—including batteries, date/time, and cuff adjustment—in under 10 minutes. Expect a few extra minutes if you’re configuring multiple user profiles or pairing with a smartphone app.
Upper arm vs. wrist monitors—which is more accurate for home use?
Upper arm monitors are generally more accurate due to better artery alignment and reduced sensitivity to positioning. Wrist monitors can be precise if used exactly at heart level, but small errors in position can cause large discrepancies.
What’s the minimum memory capacity I should look for?
For solo users, 30–60 readings is usually sufficient for monthly tracking. If you share the monitor or want to show long-term trends to your doctor, look for 60+ readings per user or app connectivity for cloud storage.
Can I use rechargeable batteries in my digital blood pressure monitor?
Most monitors accept standard AA or AAA rechargeable batteries, but battery life may be slightly shorter than with alkalines. Always check your manual for compatibility, and avoid mixing battery types in the same device.
What should I do if my readings seem unusually high or low?
First, double-check your cuff placement, arm position, and rest period before measuring again. If abnormal readings persist, compare with a manual reading at a pharmacy or clinic, and consult your healthcare provider for further evaluation.
Is it safe to share my monitor with another person?
Yes, as long as each user has a separate profile or logs their readings distinctly. Clean the cuff between uses if sharing with someone outside your household, especially if there’s any risk of skin infections or open wounds.
What’s the expected lifespan of a digital blood pressure monitor?
With regular home use and proper care, most digital monitors last 3–5 years before accuracy may decline. Replace the cuff if it shows signs of wear, and check the monitor’s calibration periodically if recommended by the manufacturer.
Compare today’s deals if you’re ready to upgrade or want to see options with longer warranties and more robust build quality.
Bottom line: get the basics right for reliable home readings
The difference between a digital blood pressure monitor that builds your confidence and one that leaves you guessing comes down to setup. Prioritize cuff fit, correct positioning, and a clean data setup—these details matter more than flashy features or app extras. Follow the steps above, avoid the common pitfalls, and you’ll get readings you and your doctor can trust. If you want to explore more advanced options or find a monitor tailored to your needs, view options and compare what’s available now.


Last updated: June 2026 · Editorial standards