9 min read
Disclosure: As an Amazon Associate and eBay Partner Network publisher, we earn from qualifying purchases. This doesn’t affect what we recommend or how we describe it.
Digital blood pressure cuffs vary by as much as ±10 mmHg between devices and users, according to independent testing by consumer watchdogs. That’s a bigger margin than most people realize—and it means a poorly calibrated monitor could leave you with false reassurance or unnecessary worry. Understanding how to calibrate a digital blood pressure cuff, and knowing when it’s truly necessary, is essential for anyone who monitors their blood pressure at home, especially if you’re tracking changes over time or sharing readings with your healthcare provider.
Why home blood pressure readings can drift
Most digital blood pressure cuffs use oscillometric sensors to measure pressure changes in the cuff as it deflates, converting these into systolic and diastolic values. Over time, several factors can nudge these readings off course:
- Sensor aging: The micro-pressure sensors inside the device can lose sensitivity after years of use or exposure to humidity and temperature swings.
- Cuff wear: Velcro, air bladders, and tubing can leak or stiffen, altering how pressure is transmitted and measured.
- Battery level: Low batteries can cause inconsistent pump or sensor performance, leading to variable readings.
- Software glitches: Some devices need periodic resets or firmware updates to maintain accuracy.
Even with regular care, no digital cuff is perfectly accurate forever. That’s why most guidelines recommend checking your monitor’s accuracy at least once every 1-2 years, or if you notice unexpected changes in your readings.
What “calibration” actually means for digital cuffs
Unlike old-school manual aneroid sphygmomanometers, which require mechanical calibration against a mercury standard, most consumer digital cuffs aren’t designed for user adjustment. “Calibration” usually means verifying the device’s readings against a trusted reference—typically a recently serviced professional-grade device in a clinic or pharmacy. Only a minority of high-end or clinical-use digital cuffs allow user-accessible recalibration, and these generally require specialized equipment.
For nearly all home users, calibration is about checking accuracy, not adjusting the device. If your monitor is off by more than ±5 mmHg compared to a clinical standard, most manufacturers recommend replacing it. Still, there are practical steps you can take to check and, in rare cases, recalibrate certain digital cuffs.
Comparison: Digital blood pressure cuff “calibration” options
| Calibration Method | Who It’s For | Accuracy Check | User-adjustable? | Typical Time |
|---|---|---|---|---|
| Clinic comparison | Most home users | ±2 mmHg (if done side-by-side) | No | 10-15 min |
| Pharmacy kiosk check | Quick spot-checkers | ±3-5 mmHg | No | 5-10 min |
| Manufacturer recalibration service | Long-term heavy users | Factory standard (±1 mmHg) | Rarely | 1-4 weeks (shipping) |
| Self-test with calibrator pump | Technical users | ±1-2 mmHg (with reference device) | Sometimes (advanced models) | 15-30 min |
| App/software guided check | Tech-savvy users | ±3 mmHg (if paired with reference) | Limited | 10-20 min |
When to check or calibrate your cuff
Three scenarios should trigger a calibration check:
- Unexpected readings: Sudden jumps or drops in your numbers, especially if they don’t match how you feel.
- Device age: If your cuff is more than 2 years old or has seen heavy use (over 500 readings), accuracy may drift.
- Before sharing data: If you’re sending readings to a healthcare provider for medical decisions, verify your device first.
Most home monitors don’t need frequent calibration, but if you’re in any of these situations, taking 15 minutes to check accuracy is worth it.
Step-by-step: How to check and (rarely) recalibrate a digital blood pressure cuff
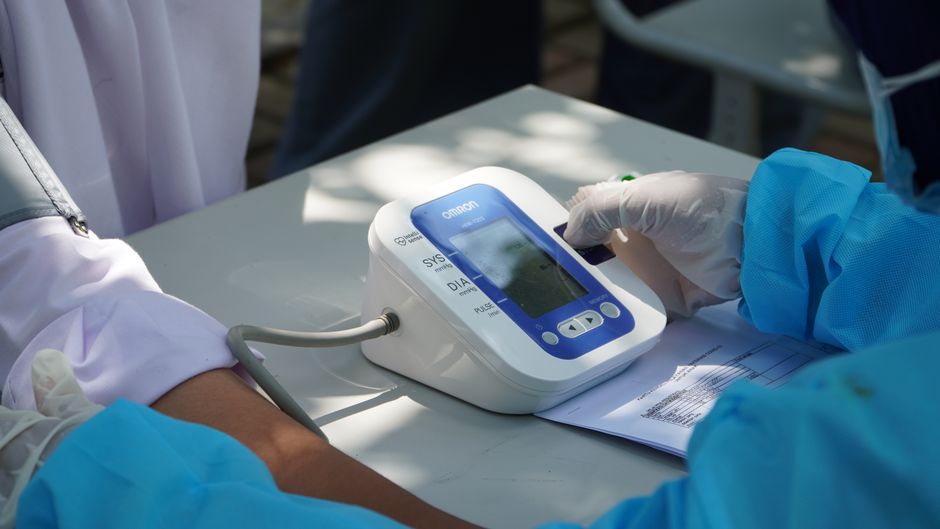
- Gather your reference device. Ideally, use a recently serviced manual or clinical-grade digital monitor (not another consumer cuff). Ask your clinic or pharmacy if you can use theirs for a side-by-side test.
- Set up both devices. Place both cuffs on the same arm, one above the other (not overlapping), or take sequential readings within 1-2 minutes of each other, with the arm at heart level and relaxed.
- Take multiple readings. Record at least three readings on each device, resting 1-2 minutes between each measurement. This helps average out natural blood pressure fluctuations.
- Compare results. Calculate the average systolic and diastolic values from each device. If your home cuff is within ±5 mmHg of the reference, it’s considered acceptably accurate for most uses.
- Attempt user calibration (if supported). If your model offers a calibration mode (rare; check the manual), follow on-screen prompts or app instructions to input reference values or adjust sensor offsets. This may require a password or special tool.
- Contact the manufacturer if needed. If your device is consistently off by more than 5 mmHg and doesn’t support user calibration, contact the manufacturer for service or replacement options. Some offer mail-in recalibration for a fee.
For most users, steps 1-4 are all you’ll ever need. Only high-end or professional devices allow true user recalibration; for the rest, accuracy checks and timely replacement are your best tools.
What accuracy numbers actually mean in real life
Many sellers advertise “clinically validated” or “medical grade” accuracy, but the numbers matter. The current international standard for digital blood pressure monitors (ISO 81060-2:2018) requires an average accuracy within ±5 mmHg, with a standard deviation of less than 8 mmHg, when tested against a mercury standard in at least 85 people. A home device that’s off by 3 mmHg is usually fine for tracking trends, but a consistent 7-10 mmHg error is enough to mask or exaggerate real clinical changes.
Also, blood pressure can naturally fluctuate by 5-10 mmHg minute to minute, even at rest. That’s why you need to average multiple readings when checking calibration. If your device’s readings are always close to the reference, you’re in good shape. If there’s a consistent gap, it’s time for a new monitor or professional recalibration.
Related Guides
- How to Calibrate a Digital Blood Pressure Cuff: A Step-by-Step Guide
- How to Set Up a Digital Blood Pressure Monitor: Step-by-Step Guide
- The Best Blood Pressure Monitors, Reviewed and Compared
- Best Bluetooth Blood Glucose Meters: A Practical Buyer’s Guide
- Digital Dynamometer Prices: What to Expect and How to Find the Best Deals
- Our guide to Digital Scales vs Analog Scales: Which Should You Choose?
Red flags in listings to walk past
- No accuracy specification: If a listing doesn’t state the device’s accuracy (in mmHg), it’s usually not been validated or is hiding poor performance.
- “Universal fit” cuffs without size range: Proper cuff fit is essential. Listings that don’t specify arm circumference in centimeters or inches are likely cutting corners.
- No mention of clinical validation: Devices not claiming to meet international standards (such as ISO 81060-2) may be based on unproven algorithms.
- Only powered by non-replaceable batteries: Monitors that can’t use standard AA/AAA batteries or USB power are more likely to suffer from voltage drops that skew readings over time.
- Absence of warranty or service info: If there’s no stated warranty (at least 1 year) or way to contact the seller for recalibration, skip it—support is minimal or nonexistent.
What to expect from manufacturer calibration services
If your device is out of warranty or you want factory-level accuracy, some manufacturers offer mail-in recalibration. Expect to pay a moderate fee and be without your device for 1–4 weeks. The process involves testing your monitor against a certified reference standard, replacing worn components, and resetting internal calibration data. Not all brands offer this, and shipping costs can add up, so for budget models, replacing the unit is often more practical.
Common mistakes that throw off home readings
Even a perfectly calibrated cuff can give inaccurate results if used incorrectly. The most common pitfalls:
- Wrong cuff size: Using a cuff too small or too large can change readings by 5–15 mmHg. Always check your arm circumference and match it to the stated cuff range.
- Poor positioning: The cuff should be at heart level and the arm relaxed. Sitting with your arm hanging down or tensed can raise systolic readings by 10 mmHg or more.
- Talking or moving: Even minor movement or conversation during measurement can skew results.
- Single readings: Blood pressure varies naturally. Take at least two readings, 1–2 minutes apart, and average them for a more reliable number.
For more on home measurement best practices, see resources from the American Heart Association.
FAQ: Real-world calibration and buying questions
How often should I check my digital blood pressure cuff’s calibration?
Most experts recommend verifying your monitor’s accuracy every 1–2 years, or sooner if you notice unexpected changes in readings. If your device is used daily or by multiple people, check it annually.
What’s the difference between clinic and home calibration methods?
Clinic checks compare your device directly to a recently serviced clinical monitor, offering more reliable accuracy (within ±2 mmHg). Home calibration relies on another consumer device and is less precise, but still useful for spotting major errors.
Can I recalibrate my digital cuff myself, or do I need special equipment?
Most home cuffs don’t allow user recalibration. Some advanced or professional devices provide a calibration mode that requires a reference pressure source and, often, a password or tool. For most users, checking accuracy is the practical approach.
How many mmHg of difference is acceptable between my cuff and a clinical device?
A difference of up to ±5 mmHg is considered acceptable for home use. If your monitor consistently differs by more than this, consider replacing it or sending it for professional recalibration.
What should I do if my cuff’s readings are inconsistent or vary widely?
First, check battery level, cuff fit, and positioning. If inconsistencies persist across multiple readings, compare with a clinical device. Persistent large discrepancies usually mean the cuff is worn out or damaged.
Are pharmacy blood pressure kiosks accurate enough for calibration checks?
Pharmacy kiosks are useful for rough spot-checks, with accuracy typically within ±3–5 mmHg. For critical calibration, use a clinical-grade reference or ask a healthcare provider for help.
Does warranty cover recalibration or replacement if my device is inaccurate?
Many manufacturers offer a 1–3 year warranty covering defects and, sometimes, recalibration or replacement if the device is inaccurate. Always check warranty terms before buying, as coverage varies.
Making the right call: replace, recalibrate, or keep using?
If your digital blood pressure cuff is within ±5 mmHg of a trusted reference, you’re in good shape—just keep checking every year or so. If it’s off by more, and there’s no user calibration option, replacement is the safest bet. For heavy users or those with advanced models, professional recalibration is sometimes cost-effective. Ultimately, regular checks matter more than chasing perfect numbers. For most people, a reliable, well-maintained home monitor is enough to track trends and share actionable data with your healthcare provider. See what’s available if you’re ready to upgrade, or compare today’s deals for monitors with proven accuracy and support.


Last updated: July 2026 · About our research