9 min read
Disclosure: As an Amazon Associate and eBay Partner Network publisher, we earn from qualifying purchases. This doesn’t affect what we recommend or how we describe it.
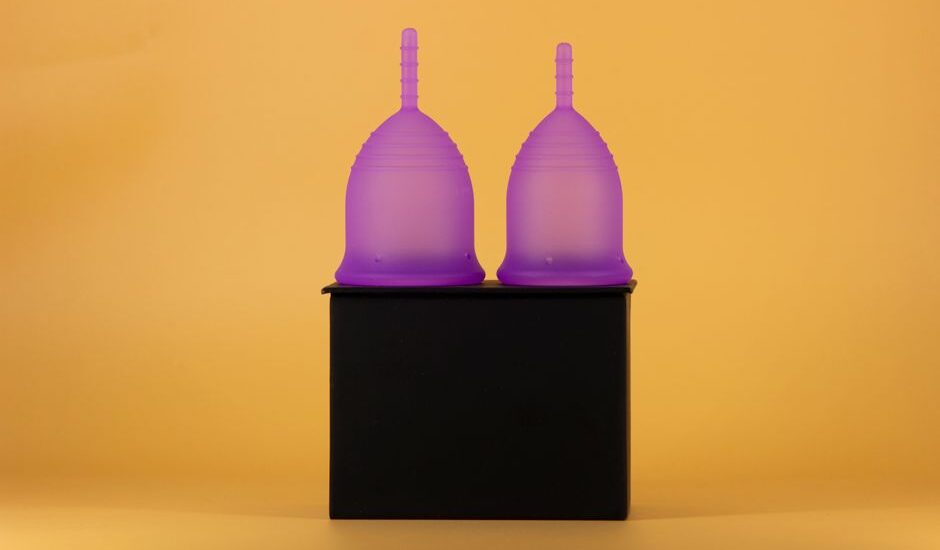
Boiling is not always the gold standard for sterilizing a menstrual cup at home. Most guides push you straight to the stovetop, but the reality is more nuanced: not every cup material tolerates high heat, and not every kitchen setup is equally safe or convenient. The best method depends on your specific cup, your water quality, and your tolerance for risk. Understanding the actual science behind cup sterilization—what “sterile” really means, what your real-world contamination risks are, and what works when you don’t have access to a stove—can mean the difference between a cup that’s genuinely safe and one that’s just been rinsed in hot water. Let’s get into what actually matters.
What “Sterile” Means for Menstrual Cups
Sterilization is a clinical term: it means the destruction of all forms of microbial life, including bacteria, viruses, and spores. In a hospital, this is achieved with autoclaves—pressurized steam at 121°C or higher. At home, you’re working with less precise tools. The goal isn’t perfection; it’s reducing microbes to a level that’s safe for vaginal use. Most menstrual cups are manufactured from medical-grade silicone, which can tolerate temperatures up to 230°C, but some cups use thermoplastic elastomer (TPE), which can deform at lower temperatures (as low as 120°C). That means boiling is generally safe for silicone cups, but may damage some TPE options. Always check your cup’s documentation for heat tolerance before boiling.
How the Main Home Sterilization Options Compare
| Method | Core Equipment Needed | Heat/Disinfection Level | Time Required | Material Compatibility |
|---|---|---|---|---|
| Stovetop Boiling | Pot, water, timer | 100°C (boiling point) | 5–10 min | Silicone only |
| Microwave Steam | Microwave-safe container, water | ~100°C (steam) | 3–5 min | Silicone, some TPE |
| UV Sterilizing Device | UV-C device, cup | UV-C (254 nm) | 3–10 min | Silicone, TPE |
| Chemical Disinfection | Milton tablets or 3% hydrogen peroxide, container | Chemical (not true sterilization) | 15–20 min | Silicone, TPE |
| Dishwasher (top rack) | Dishwasher, detergent | ~70°C (sanitizing, not sterilizing) | 1 cycle (1–2 hr) | Silicone only |
Boiling: Pros, Cons, and Critical Details
Boiling is the most widely recommended home sterilization method for menstrual cups, but it’s not without pitfalls. You need at least 5 minutes of rolling boil to achieve a meaningful reduction in bacteria and viruses. Anything less is just a hot rinse. Silicone cups handle this easily; TPE cups may warp, so check your cup’s manual before boiling. Use a dedicated pot if possible—residual food oils or soap residue can degrade the cup’s surface or leave behind irritants. Hard water can leave mineral deposits on the cup, which look like white spots and are harmless but can trap bacteria if not removed between cycles.
Never let the cup rest against the bottom of the pot—this can cause localized overheating and deformation. Float the cup in plenty of water or use a whisk to keep it suspended. Set a timer; over-boiling can weaken the cup over time. Boiling does not remove stains, only microbes. For stubborn discoloration, hydrogen peroxide soaks are more effective (but require thorough rinsing).
Check current pricesMicrowave Steam: Fast, Effective, but Not Universal
Microwave sterilization is popular for its speed, but it’s not risk-free. You’ll need a microwave-safe steam container—never use a sealed container, as pressure buildup can cause explosions. Add enough water to generate steam (usually 100–200 ml), place the cup inside, and run the microwave for 3–5 minutes at full power. Steam reaches temperatures close to boiling, but uneven heating is possible; always let the container sit for a minute before opening to avoid burns.
Some TPE cups are not microwave-safe and may melt or deform. Always check your cup’s documentation. Silicone generally fares well, but colored cups may fade slightly over time. Microwave steam is not suitable in areas with unreliable power or where microwaves are not available. If you share a household microwave, be aware that steam sterilizing menstrual cups is not universally accepted—social context matters.
See what’s availableUV Sterilization: When Boiling Is Not an Option
UV-C sterilizers use ultraviolet light at wavelengths around 254 nm to break down microbial DNA, killing bacteria and viruses. These devices are common in dental and baby bottle sterilization and are increasingly marketed for menstrual cups. They’re chemical-free and suitable for both silicone and TPE, but are significantly more expensive than boiling or microwave options. The main drawback: the interior of the cup must be exposed to light, so you may need to rotate the cup or run multiple cycles. UV sterilization does not clean visible residues—wash the cup first.
Not all UV sterilizers are created equal. Look for units with independent third-party testing and a minimum cycle time of 3 minutes at 254 nm. Battery-powered models are portable but may have uneven coverage. UV does not remove stains or mineral deposits. For those without access to boiling water (travel, dorms, shared kitchens), UV is a practical, if pricey, alternative.
Compare today’s dealsChemical Soaking: For Sensitive Materials or No-Heat Situations
Chemical disinfectants like Milton tablets (sodium hypochlorite) or 3% hydrogen peroxide can be used when heat is not an option. These break down bacteria and viruses but do not sterilize in the strict sense. For hydrogen peroxide, soak the cup for 15–20 minutes, then rinse thoroughly—residual peroxide can irritate sensitive tissues. Chlorine-based tablets are effective, but some users report lingering odors or surface pitting after repeated use. Chemical methods are compatible with both silicone and TPE, but always check your cup’s documentation for contraindications.
Never use rubbing alcohol or undiluted bleach—these can degrade the cup and are unsafe for internal use. Chemical soaks are also best for removing stubborn stains, but always follow up with a plain water rinse to remove all residues.
View optionsHow to Sterilize a Menstrual Cup at Home: Step-by-Step Guide
- Check your cup’s material and heat tolerance. Silicone cups can usually be boiled; TPE may require lower temperatures or chemical disinfection. Refer to the original packaging or manufacturer’s website if unsure.
- Wash your hands thoroughly. Use plain soap and water, scrubbing for at least 20 seconds to avoid contaminating the clean cup.
- Clean the cup with mild, fragrance-free soap and warm water. Rinse away any soap residue completely—residual soap can cause irritation.
- Choose your sterilization method. For boiling: fill a pot with enough water to fully submerge the cup. Bring to a rolling boil. For microwave: place the cup in a microwave-safe steam container with water. For chemical: prepare the disinfectant solution as instructed.
- Sterilize for the full recommended duration. Boil for 5–10 minutes, microwave for 3–5 minutes, or soak in chemical solution for 15–20 minutes. Set a timer to avoid over- or under-processing.
- Remove the cup with clean tongs or freshly washed hands. Let it cool and air dry on a clean surface. Do not use a towel, as lint may stick to the cup.
- Store the sterilized cup in a breathable pouch. Avoid airtight containers, which can promote mold growth if any moisture remains.
Common Mistakes That Undermine Sterilization
Some errors can turn a well-intentioned sterilization routine into a health risk. The most frequent: under-boiling (less than 5 minutes), boiling in a dirty or oily pot, and using harsh cleaning agents. Scented soaps leave residues that disrupt vaginal pH. Using a towel to dry the cup can transfer lint or bacteria. Improper storage—such as sealing a damp cup in a plastic bag—promotes mold and bacterial growth. Microwave shortcuts (e.g., not adding enough water) can damage both the cup and your appliance. Finally, failing to wash your hands before handling the cup post-sterilization undermines the entire process.
For a deep dive on safe menstrual hygiene practices, see the World Health Organization’s menstrual health guidelines.
Related Guides
- How to Safely Sterilize Your Menstrual Cup at Home
- Home Vein Finders That Actually Work: Our Top Recommendations
- The Best Acupressure Mats Worth Trying for Home Wellness
- Our guide to Electric Nail Files Worth Trying for Salon-Quality Results at Home
- Our guide to Air Purifiers vs Humidifiers: Which One Does Your Home Really Need?
- Digital Otoscopes for Home Use: What to Know Before You Buy
Beginner’s Pre-Purchase Checklist
- Confirm your cup’s material—know whether it’s medical-grade silicone or TPE before choosing a sterilization method.
- Measure your cervix height to ensure the cup fits comfortably and seals properly.
- Check your home water source for hardness; hard water can leave deposits on cups when boiling.
- Verify you have a dedicated, clean pot or microwave-safe container for sterilization.
- Assess whether you have access to reliable electricity for microwave or UV sterilization, if not using boiling.
- Read manufacturer instructions for maximum heat exposure and cleaning agent compatibility.
- Plan for discreet storage—a breathable cloth pouch is best for air-drying and minimizing odor.
FAQ: Real-World Answers to Menstrual Cup Sterilization Questions
How often should I sterilize my menstrual cup?
Sterilize your cup at the start and end of each menstrual cycle. Daily cleaning with soap and water during your period is sufficient; full sterilization between cycles is the standard for most users.
Is boiling always safe for menstrual cups?
Boiling is safe for medical-grade silicone cups but can damage some TPE cups. Always check your cup’s heat tolerance. Never let the cup touch the pot’s bottom to avoid warping.
How long should I boil a menstrual cup?
Boil the cup for 5–10 minutes at a full rolling boil. Less time may not fully kill bacteria and viruses; more time can degrade the cup’s material over repeated cycles.
Microwave steam vs. boiling — which is better?
Microwave steam is faster and convenient, but boiling is more universally compatible with all cup types. Microwave sterilization requires a dedicated container and may not be suitable for all TPE cups. Boiling is best for thorough, material-safe sterilization.
Can I use hydrogen peroxide to sterilize my cup?
3% hydrogen peroxide is effective for disinfecting and removing stains, but it’s not a full sterilant. Always rinse thoroughly after soaking to avoid irritation. Never use higher concentrations or mix with other chemicals.
What if I don’t have access to a stove or microwave?
Use a chemical disinfectant like a Milton tablet or 3% hydrogen peroxide solution. UV sterilizers are also an option if you can access one. Always ensure the cup is rinsed and dried before storage, regardless of the method.
What should I do if my cup develops an odor or discoloration?
Odor and discoloration are usually harmless but can indicate incomplete cleaning. Soak the cup in 3% hydrogen peroxide for 15–20 minutes, then rinse. Persistent odor may require replacing the cup, especially if the surface feels sticky or rough.
The Bottom Line: Choose the Method That Matches Your Cup and Context
There’s no one-size-fits-all answer to menstrual cup sterilization. Boiling is effective and cheap but not always safe for every material. Microwave steam is fast, but only with the right equipment and cup type. Chemical and UV methods fill the gaps for sensitive materials or travel situations. The best approach is the one that matches your cup’s specs, your available tools, and your comfort level with each method. Prioritize clean hands, thorough rinsing, and careful storage—these matter as much as the sterilization method itself.


Last updated: June 2026 · About our research