8 min read
Disclosure: As an Amazon Associate and eBay Partner Network publisher, we earn from qualifying purchases. This doesn’t affect what we recommend or how we describe it.
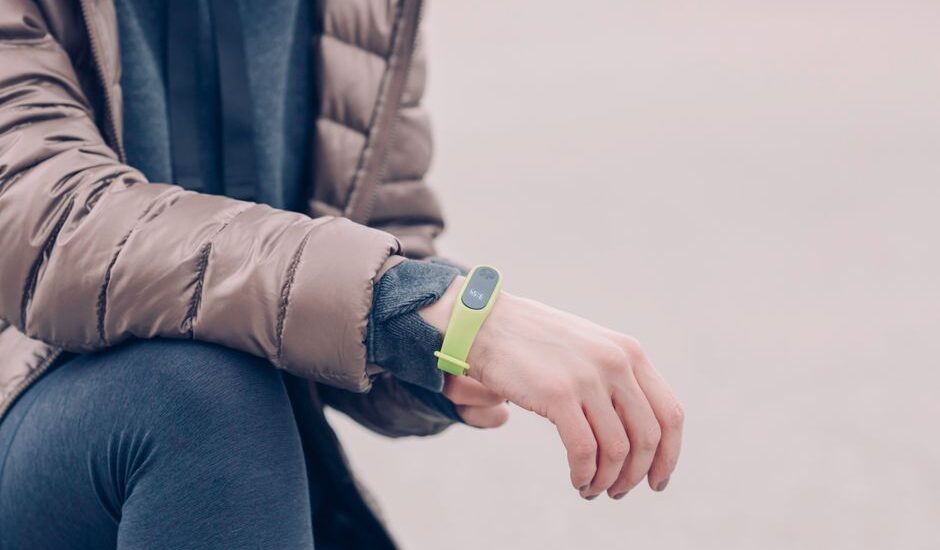
You’re heading out for a run, but your fitness tracker’s band is pinching your wrist, or maybe the color just isn’t your style. Swapping out the band sounds easy—until you discover that not all fitness tracker bands use the same attachment system, and forcing the wrong move can snap a pin or leave your expensive device on the floor. This guide is for anyone who wants to change their fitness tracker band without frustration, breakage, or wasted time. You’ll find step-by-step instructions, detailed comparisons of band types and mechanisms, common mistakes to avoid, and practical tips for getting a secure, comfortable fit.
Spot the Right Band Attachment System for Your Tracker
The first step in changing your fitness tracker band is understanding how your tracker’s bands actually attach. Not all trackers use the same system, and mixing up mechanisms can result in bent pins, cracked casings, or a loose fit that puts your device at risk. Here are the most common attachment systems you’ll encounter, along with the concrete details that matter.
- Quick-release spring bars: Look for a small lever or knob on the underside of each band end. The spring bar retracts, allowing you to pop the band free. Most use 18mm or 20mm bars, but measure with a ruler to be sure—1mm off can mean a sloppy or impossible fit.
- Pin-and-hole systems: The band end features a protruding metal or plastic pin that snaps into a hole or slot on the tracker body. These are often proprietary, and the pin diameter (usually 1.5-2mm) must match exactly.
- Integrated slide-in bands: The entire band end slides into a channel on the tracker. A button or latch locks it in place. The channel width (commonly 18-22mm) is critical—too wide or narrow and the band won’t seat securely.
- Classic watch-style lugs: Some fitness trackers mimic traditional watches, using removable spring bars between lugs. Lug width is typically 18, 20, or 22mm; measure the gap with calipers or a ruler for precision.
Check your tracker’s manual or look up the model on the manufacturer’s site for exact specs. If your band is a unique shape or uses a hidden slide mechanism, you may be limited to that brand’s replacements—generic bands won’t fit.
How the Main Band Types Compare
The choice of replacement band isn’t just about color or material. Attachment method, adjustability, comfort, and price all matter. Here’s how the main band categories stack up for real-world use cases.
| Band Type | Attachment Mechanism | Adjustability | Material Options | Best For |
|---|---|---|---|---|
| Quick-release silicone | Spring bar, 18-22mm lever | Multi-hole buckle | Silicone, TPU | Everyday, workouts |
| Pin-and-hole proprietary | Snap-in pin, 1.5-2mm | Fixed or single-hole | Silicone, woven nylon | Brand-specific, tight fit |
| Slide-in channel | Sliding latch, 18-22mm | Magnetic or clasp | Silicone, metal mesh | Minimalist, dress use |
| Classic watch-lug | Spring bar, 18/20/22mm | Buckle, deployant clasp | Leather, nylon, metal | Style customization |
| Loop or wrap band | Elastic slip-on | Stretch fit, no buckle | Woven nylon, elastomer | Comfort, sleep tracking |
How to Change the Band: Step-by-Step for Every System
Don’t risk breaking your tracker or losing a tiny spring bar. Here’s a detailed, stepwise approach tailored to the five main attachment systems above. Have a clean, flat workspace and a small tool like a spring bar remover or thin flathead screwdriver if your band doesn’t have a built-in lever.
- Identify your band type and gather tools. Check your tracker’s underside and consult the manual or manufacturer’s website to confirm the attachment system. For quick-release or watch-lug bands, have a spring bar tool or similar on hand.
- Release the old band safely. For quick-release, slide the lever toward the center and gently pull the band away. For pin-and-hole, press the release button or gently pry the pin out. For slide-in channels, press the latch or button and slide the band out carefully.
- Inspect attachment points for debris or wear. Wipe away dust, sweat, or skin oils with a soft cloth. Check for bent or damaged pins—replace if necessary. A damaged pin can cause the band to detach during use.
- Align and attach the new band. For quick-release or watch-lug, insert one end of the spring bar into the lug or hole, then compress the lever and seat the other end. With slide-in bands, align the channel and push until you hear a click. With elastic or loop bands, slip over the tracker body as directed.
- Test for secure fit and comfort. Tug gently on each band end to ensure it’s locked in. Wear the tracker as you would for daily use—adjust for snugness, but not so tight it restricts circulation. Check that heart rate sensors, if present, sit flush against your skin.
If you’re missing a tool, many quick-release bands can be changed with just your fingernail, but a proper spring bar tool (typically 1-2mm fork end) reduces the risk of slipping and scratching the tracker body. Feeling stuck? Compare today’s deals on multi-band kits that include all necessary tools.
Choose the Right Replacement Band for Your Needs
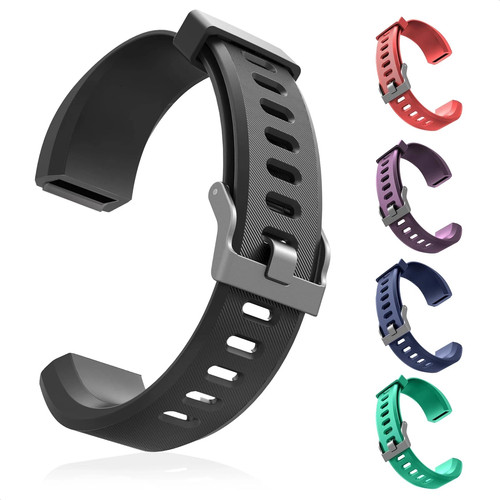
Replacement bands aren’t just about aesthetics—material, adjustability, and compatibility matter for comfort and long-term use. Here’s how to zero in on the right band for your routine:
- Sweat and water exposure: For swimming, running, or heavy workouts, pick a silicone or TPU band with water resistance. Look for a band rated for at least IP67 standards, meaning it can withstand full submersion up to 1 meter for 30 minutes.
- Skin sensitivity: If you experience rashes or irritation, avoid bands with nickel or low-grade metal. Opt for medical-grade silicone or woven nylon, and check for third-party dermatology recommendations if you have known allergies.
- Style and versatility: For work settings or formal occasions, leather or stainless steel bands with classic watch lugs offer a dressier look. These typically use 18mm, 20mm, or 22mm widths—measure to confirm fit.
- Sleep tracking and comfort: Elastic loop bands (often called “solo loops”) provide a secure, buckle-free fit that won’t dig into your wrist overnight. Choose a band with a stretch rating that matches your wrist circumference (usually in 5-10mm increments).
- Budget constraints: Off-brand silicone bands are widely available and often cost a fraction of proprietary replacements. However, check user reviews for pin strength and fitment—poorly molded bands can pop loose during activity.
Related Guides
- Our guide to How to Change the Band on Your Fitness Tracker: Step-by-Step Guide
- Our guide to Smart Ring vs Fitness Band: Which Wearable Is Right for You?
- How Accurate Are Fitness Tracker Heart Rate Measurements?
- How to Charge a Fitness Tracker: Simple Steps for Every Model
- Our guide to How to Clean Fitness Mats: A Step-by-Step Guide
Common mistakes to avoid
- Mixing up band widths: Buying a 20mm band for an 18mm tracker leaves you with a sloppy fit or a band that won’t attach at all. Always measure the attachment width, not just the tracker body.
- Ignoring proprietary connectors: Assuming all bands are interchangeable can lead to wasted money. Some trackers require a specific connector shape or pin size—generic bands won’t fit.
- Forcing the band: Forcing a spring bar or pin can bend or snap the internal mechanism. If the band doesn’t slide in smoothly, double-check alignment before applying more force.
- Skipping the fit test: Many users forget to tug on each band end after attaching. A loose fit risks your tracker dropping off during activity—always test before wearing out.
- Neglecting skin contact: Overly thick or stiff bands can prevent sensors from sitting flush against your wrist, leading to inaccurate heart rate or activity readings. Opt for bands designed with a tapered or contoured underside for sensor models.
FAQ: Changing Fitness Tracker Bands
How do I know what size replacement band to buy?
Measure the width of the band attachment point (the area between the lugs or pins) with a ruler or calipers. Common widths are 18mm, 20mm, or 22mm. The band width must match this measurement exactly for a secure fit.
Can I use a generic band with my fitness tracker?
It depends on your tracker’s attachment system. Many use proprietary connectors or custom pin sizes, so generic bands may not fit. Check your device’s manual or manufacturer’s website for compatibility details before purchasing.
How often should I replace my fitness tracker band?
Most silicone or nylon bands last 6-12 months with daily wear, but sweat, sunlight, and frequent removal can shorten lifespan. Replace immediately if you notice cracks, tears, or if the band loses elasticity or no longer fits securely.
What’s the difference between quick-release and classic watch-style bands?
Quick-release bands have a small lever on the spring bar for tool-free removal, while classic watch-style bands require a spring bar tool to compress and remove the bar. Quick-release is faster but may not be as secure for heavy activity as a properly installed classic spring bar.
Are there risks to changing the band myself?
Improper removal can bend or snap pins, scratch the tracker, or result in a loose fit. Using the correct tool and following step-by-step instructions greatly reduces risk. Always test the band’s security before resuming activity.
Can I buy a replacement band if my tracker is a discontinued model?
Yes, but your options may be limited. Look for third-party bands that specify compatibility with your tracker’s model and attachment size. For rare or older devices, online forums and specialty retailers may help you locate compatible bands.
Which band type is best for swimming?
Silicone or TPU bands rated for at least IP67 water resistance are best for swimming. Avoid leather, fabric, or metal mesh bands, as these can degrade or trap moisture, leading to skin irritation or odor.
Why Secure Fit Matters More Than Style
Changing your fitness tracker band is one of the quickest ways to improve comfort and extend your device’s lifespan—but only if you get the technical details right. A secure fit isn’t just about avoiding drops; it ensures sensors function properly and you get accurate tracking. Measure carefully, choose the right attachment system, and don’t cut corners with tools or fit checks. When in doubt, opt for a band that matches your activity level and skin needs—comfort and reliability always beat out looks alone. Ready to upgrade? View options that fit your tracker and your life.



Last updated: July 2026 · Editorial standards